
Updated on 27 October 2014
CIS Returns
You need to file CIS return by 19th each month. Tax period is always from 6th to 5th each month (for example from 6th November to 5th December).
You can file your CIS return online or by post. If you didn’t do any payments to subcontractors, you still need to file a nill return. If the return is filed late, there is £100 penalty and penalty will repeat for every month the return is outstanding.
If you know that you’re not going to make any payments to subcontractors for a period of up to six months you can choose to become ‘inactive’ for that period. HMRC won’t send you any returns for that period. And I will show you how to do that online through filing return.
This is a guide for UK CIS (Construction Industry Scheme) Contractors, how to file CIS return online.
STEP 1 – Login

Go to HM Revenue login website here.
Fill in your User ID and Password and click “Login”.
STEP 2

In the section “Services you can use”, click “Activate or access online services”.
STEP 3 – Access CIS
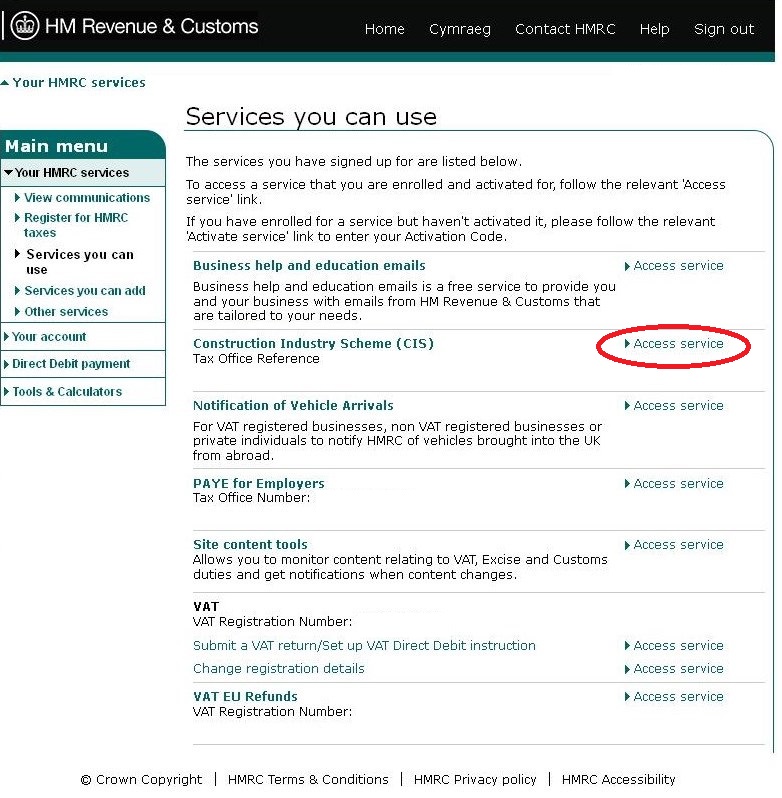
In the section “Construction Industry Scheme (CIS), click “Access service”.
STEP 4 – Adding subcontractor
You need to add your subcontractors first to be able to file CIS return for payments to subcontractors. If you are filing nill return you don’t need to add any subcontractor.
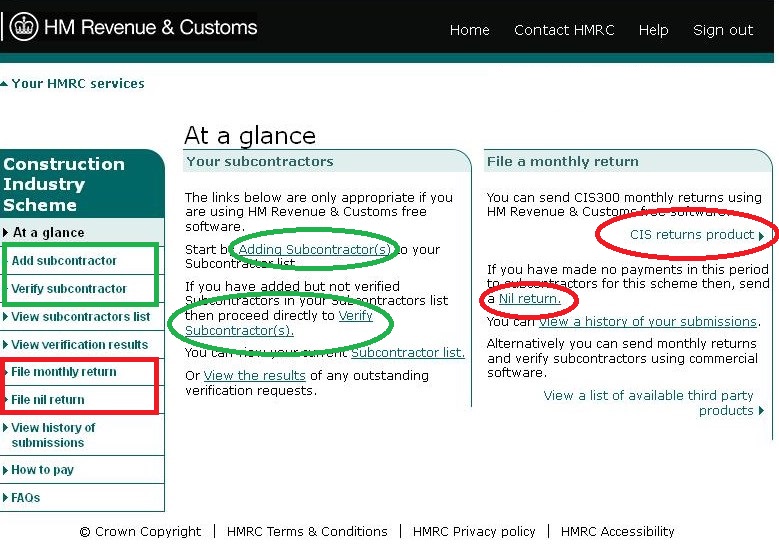
Click “Adding Subcontractor”.
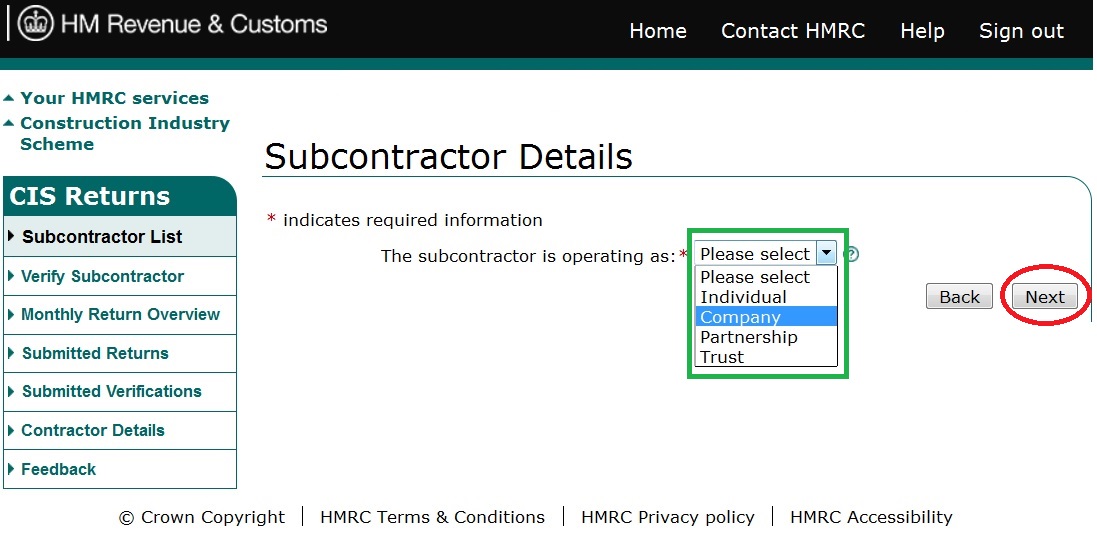
Choose if Subcontractor is Individual or Company or other. Click “Next”.

Fill in Subcontractor’s details: Name, UTR, CRN and then click “Next”.
STEP 5 – Verifying subcontractor
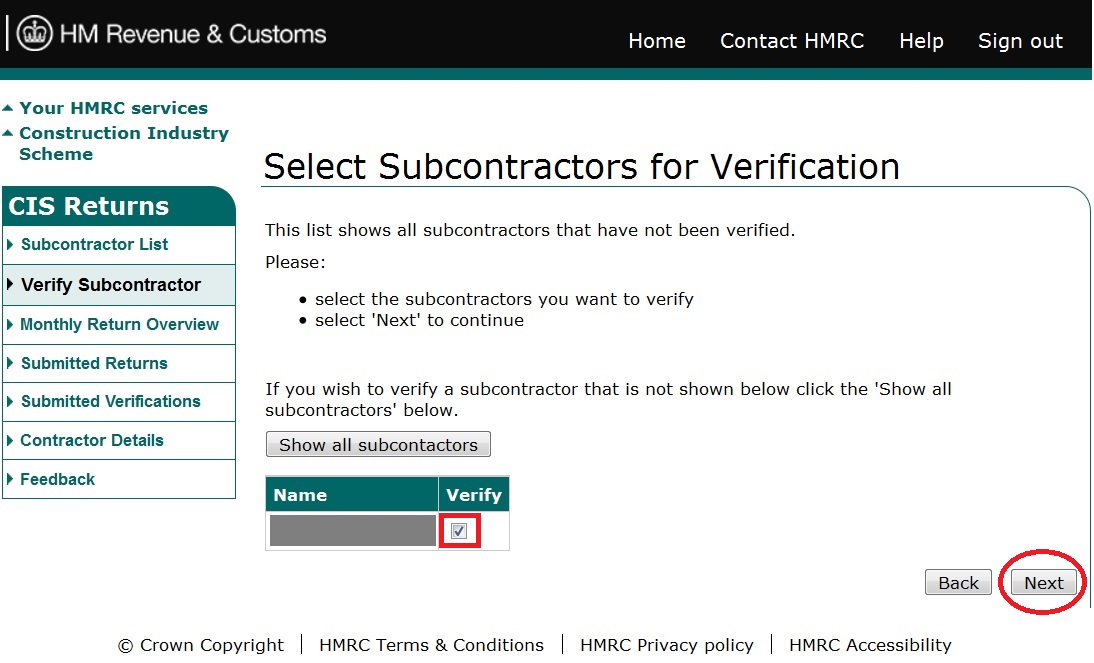
Click “Verify Subcontractor”. You should see your new Subcontractor in the table.
Tick the box in “Verify” column and click “Next”.
The subcontractor should be verified straight away and you should see Verification number.
Click “Subcontractor List” in left menu. You will see a list of all your subcontractors. Click on the subcontractor’s name you want to see details. You can now see all details including Verification number and Tax treatment.
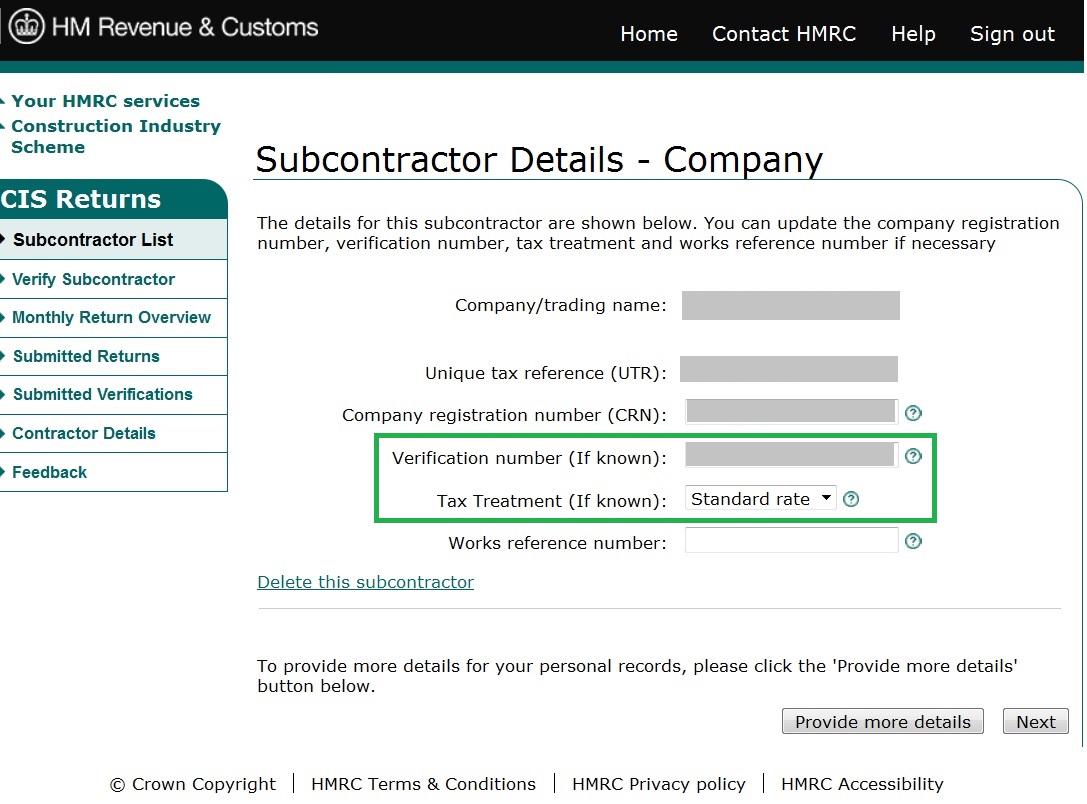
Tax treatment can be:
- Gross, means that you don’t make any deduction from subcontractor’s payment, you will pay full amount;
- Standard rate, means that you need to make 20% deduction from subcontractor’s payment, you will (generally) pay subcontractor 80% from gross invoice + VAT on the invoice (if any is there);
- Higher rate, means that you need to make 30% deduction from subcontractor’s payment, you will (generally) pay subcontractor 70% from gross invoice + VAT on the invoice (if any is there).
STEP 6 – Filing CIS return
If you haven’t made any payment to subcontractors this month, click “Nil return”.
If you have made payment to subcontractors this month, click “CIS returns product” (in the right option) or “File monthly return” (in the left menu).
STEP 7 – Select period
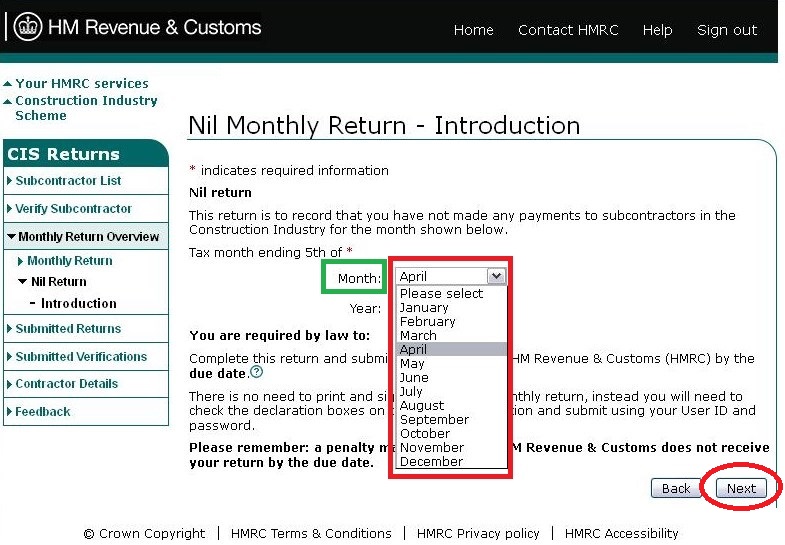
Choose Month and Year for which you are doing a return.
Be careful, CIS tax period is always from 6th to 5th, for example from 6th November to 5th December. In this case you would choose period ending 5th of December.
Click “Next”.
STEP 8 – Select subcontractor(s)

Choose subcontractors to which you made payment this month. You need to tick the box in the column called “Include this month” to select them.
Then click “Next”.
STEP 9 – Filling amounts
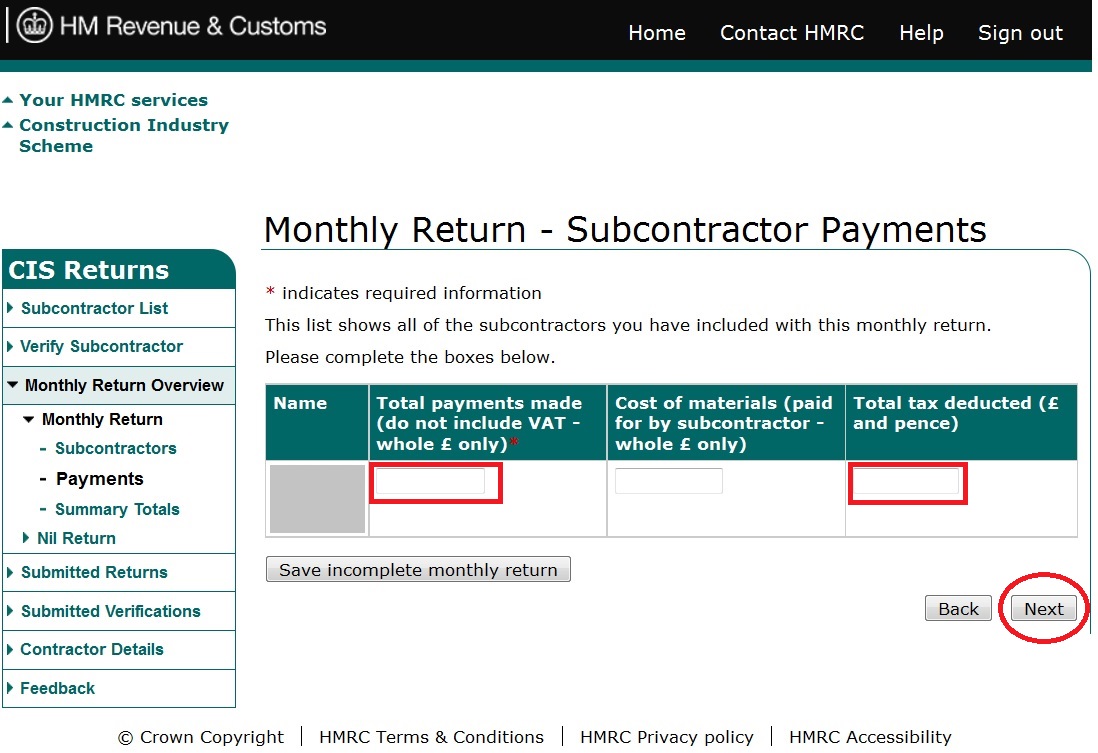
Now you will see table with all selected subcontractors. You need to fill in correct amounts for “Total payment without VAT” and “Total CIS tax deducted” for each subcontractor for this month.
Then click “Next”.
STEP 10 – Declaration
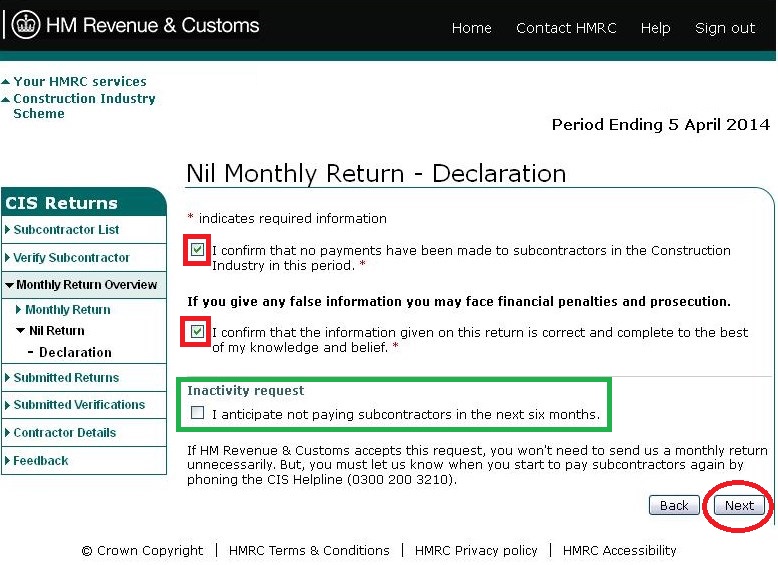
If you are filing nill return, you will skip Step 8 and 9.
Declaration for normal return will be similar to this Nill one.
Tick the boxes next to “I confirm …”.
If you expect that you won’t pay subcontractors following 6 months you can tick the box in the “Inactivity request”. It means that you won’t need to file nill returns in next 6 months. But if something change and you will pay subcontractor during this period, you can file normal CIS return. Click “Next”.
STEP 11 – Submission
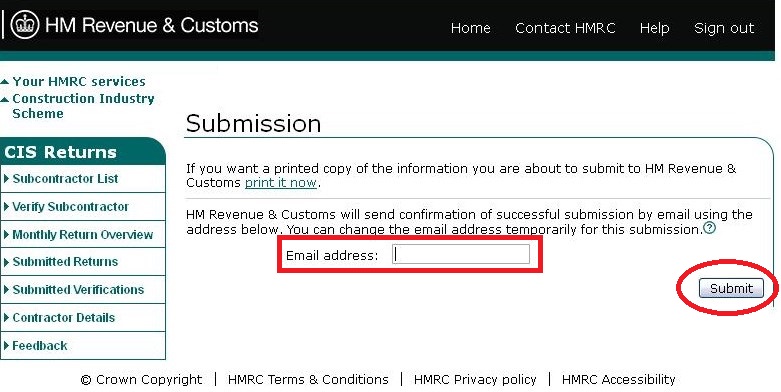
Type your e-mail address and you will receive confirmation about filing this return by e-mail.
Click “Submit”.
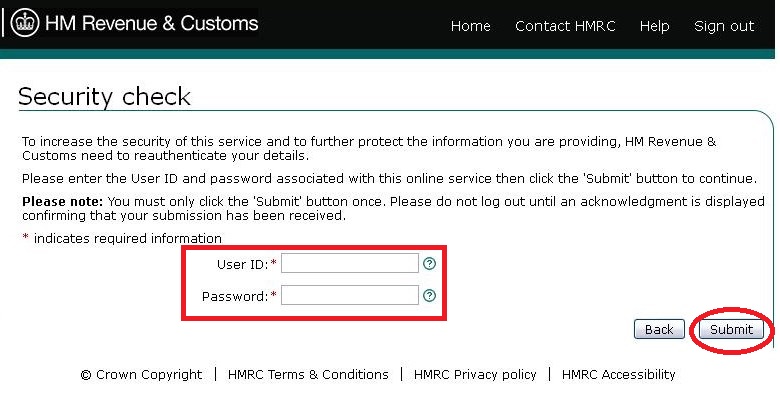
Type your login details to confirm submission.
Click “Submit”.

Submission successful. Well done.
Click “Next”.
STEP 12 – Save and print receipt and return
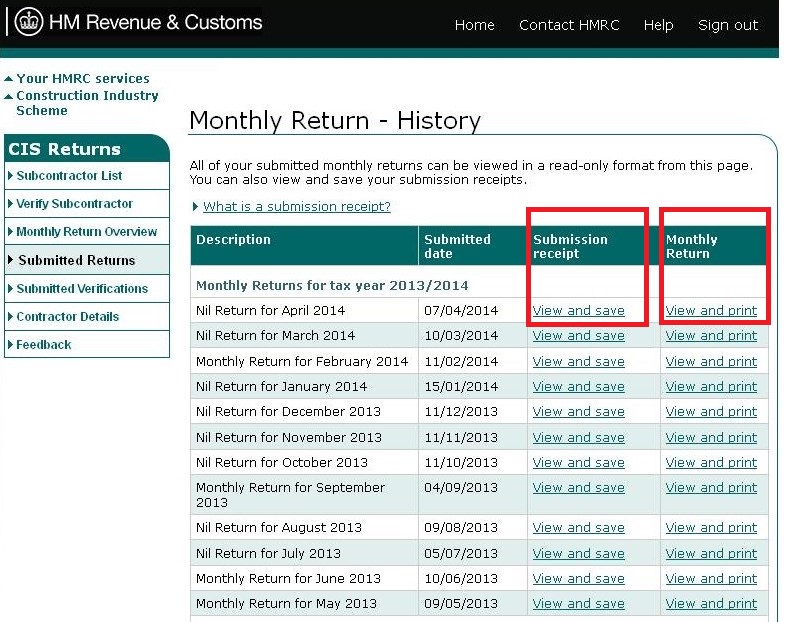
I recommend to save and print Submission receipt and Monthly return.
Click “View and save” for Submission receipt.

Submission receipt print.
Click “View and save Submission receipt”.
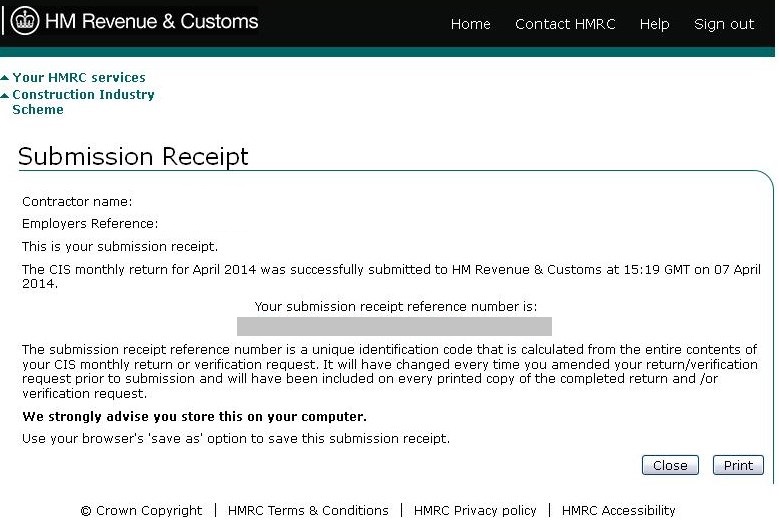
You can print your Submission Receipt for your records. Click “Print”.
Then click “Close” and you will return to Monthly return – History.
Click “View and print” for Monthly return (Step 14 screenshot).
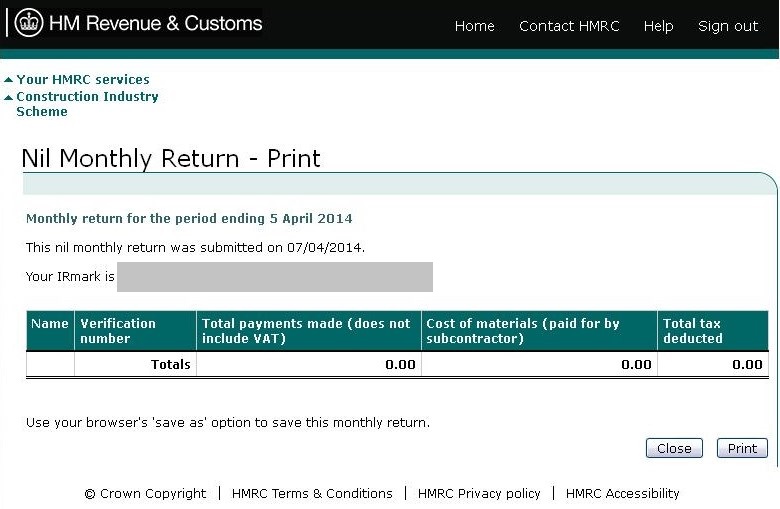
CIS return print.
You can now print your Monthly return for your records.
Click “Print”.